ROS2 + Darknet 사용하기
ROS2 Foxy에서 YoLoV3 를 돌려서 Rviz의 image topic을 통해 2D Bouning box를 확인하는 과정까지를 정리한 글입니다. (구글링으로 주워 모든 내용들, share 해준 모든 분들께 감솨~)
기본적인 구조는 opencv를 이용해서 webcam을 통해 image를 받고 이 이미지를 darknet_ros의 detector node로 보내서 Rviz에 표시하는 형태 입니다. GPU를 사용하는게 당연 좋게죠.. 저는 노트북 환경이며 GTX1070 GPU를 사용했습니다.
컴퓨터(AI)를 이용한 개체 인식 기술 발전을 위한 대회 (PASCAL, ImageNet, MS COCO) 에서 CNN이 2012년 ImageNet 대회에서 압도적인 성능을 보여 주며 영상 인식 쪽은 CNN쪽으로 기울게 됨. LeNet, VGG, ResNet, GoogLeNet, DenseNet 등의 CNN기반 네트워크들이 계속 나옴.
무엇인지 인지하는 것(Classification)에서 bounding box를 그려서 위치 검출하는 것(Localization)으로 발전 → R-CNN (Region-based CNN), Fast RCNN, Faster RCNN으로 발전 하다가, 실시간으로 객체 인식 성능이 뛰어난 YOLO가 등장 (인식률 보단 속도에 중점, 작은 물체 인식에는 한계가 있음.)SSD(Single Shot MultiBox Detector)Darknet : Joseph Redmon이 개발한 신경망 프레임워크, YOLO는 Darknet 프레임워크로 개발되어 학습된 신경망 중 하나. (속도에 집중)★ 일단 OpenCV를 설치 해보자.
https://webnautes.tistory.com/1433 참고 할 것$ sudo apt install libopencv-dev python3-opencv$ python3 -c "import cv2; print(cv2.__version__)" 로 확인$ pkg-config --modversion opencv4$ sudo apt install apt-file$ sudo apt-file update$ opencv_version 으로 확인(나는 4.2.0)$ apt-file search opencv4.pc$ sudo apt install ros-foxy-camera-calibration-parsers
$ sudo apt install ros-foxy-camera-info-manager
$ sudo apt install ros-foxy-launch-testing-ament-cmake
$ sudo apt install ros-foxy-image-pipeline$ ros2 topic hz /image_raw  ★ opencv_cam을 사용하자. 아래를 클론한다. $ git clone https://github.com/clydemcqueen/opencv_cam.git
$ git clone https://github.com/ptrmu/ros2_shared.git$ colcon build --symlink-install  빌드하고$ ros2 run opencv_cam opencv_cam_main --ros-args --param index:=0
 (frame: camera_frame, topic: /image_raw) 로 토픽 발행됨을 확인$ ros2 run image_view image_view image:=/image_raw
  --> simple viewer for ROS image topics 으로 간단히 확인 가능하다. $ ros2 run image_view image_view --ros-args --remap /image:=/image_raw
$ ros2 topic hz /image_raw카메라 캘리브레이션 (필요시)$ ros2 run camera_calibration cameracalibrator --size 8x6 --square 0.063 --approximate 0.3 --no-service-check image:=/image_raw
또는
$ ros2 run camera_calibration cameracalibrator --size 8x6 --square 0.063 --approximate 0.3 --no-service-check --ros-args --remap /image:=/image_rawtar -xvf calibrationdata.tar.gzhttps://robocademy.com/2020/05/01/a-gentle-introduction-to-yolo-v4-for-object-detection-in-ubuntu-20-04/  참고 할 것. ★ cudnn 설치 하자 ============================
https://docs.nvidia.com/deeplearning/cudnn/archives/cudnn_741/cudnn-install/index.html★ cudnn 버전 확인
$cat /usr/local/cuda/include/cudnn_version.h | grep CUDNN_MAJOR -A 2wget https://developer.download.nvidia.com/compute/cuda/repos/ubuntu2004/x86_64/cuda-ubuntu2004.pin
sudo mv cuda-ubuntu2004.pin /etc/apt/preferences.d/cuda-repository-pin-600sudo apt-key adv --fetch-keys https://developer.download.nvidia.com/compute/cuda/repos/ubuntu2004/x86_64/7fa2af80.pubsudo add-apt-repository "deb https://developer.download.nvidia.com/compute/cuda/repos/ubuntu2004/x86_64/ /"sudo apt-get updatesudo apt --fix-broken install
sudo apt-get install libcudnn8
sudo apt-get install libcudnn8-dev
sudo apt-get install libcudnn8-samplescp -r /usr/src/cudnn_samples_v8/ $HOME
cd $HOME/cudnn_samples_v8cd mnistCUDNN/
make clean
make만약 make 시 아래와 같은 에러가 나온다면
test.c:1:10: fatal error: FreeImage.h: No such file or directory다음을 설치해 준다.
sudo apt-get install libfreeimage3 libfreeimage-dev
실행 해 본다.
./mnistCUDNN..........
Result of classification: 1 3 5Test passed!sudo apt install libomp-dev
ROS2와 별개로 Darknet만 사용해 볼 경우 아래와 같이 빌드해 볼 수 있다. ★ Darknet build ================ make 사용버전git clone https://github.com/AlexeyAB/darknet.git
cd darknet/Makefile을 아래와 같이 수정 해 준다. GPU 사용 시===================
GPU=1
CUDNN=1
CUDNN_HALF=1
OPENCV=1
AVX=0
OPENMP=0
LIBSO=1
ZED_CAMERA=0
ZED_CAMERA_v2_8=0
=====================CPU only 사용 시 ===========
GPU=0
CUDNN=0
CUDNN_HALF=0
OPENCV=1
AVX=1   // 만약 실행 시 core dump 나면 0으로 설정하고 다시 make 할 것
OPENMP=1
LIBSO=1
ZED_CAMERA=0
ZED_CAMERA_v2_8=0make clean
make
================================================★ darknet build ========================= cmake 사용버전
* 주의! cmake를 update해야 할 수 있으므로 ROS2를 사용중이라면 빌드시스템에 영향을 미칠 수 있으니 주의 할 것 ROS2랑 연계해서 사용할 거라면 아래로 내려가서
그냥 openrobotics_darknet_ros를 빌드 할 것
cmake 버전 3.18  이상이 필요하다. 현재 최신 버전(cmake-3.20.2.tar.gz) 다운 받자. https://cmake.org/download/sudo apt remove cmake  // 기존버전 지우기tar -xvzf cmake-3.20.2.tar.gz
cd cmake-3.20.2
./bootstrap
make
sudo make installcmake --versioncd darknet
mkdir build_release
cd build_release
cmake ..
make
======================================================★ Yolo 사용하기
Download weight. : https://drive.google.com/file/d/1cewMfusmPjYWbrnuJRuKhPMwRe_b9PaT/view다운로드한 웨이트 파일을 darknet 폴더로 카피한다. ./darknet detect cfg/yolov4.cfg yolov4.weights data/person.jpg
또는
./darknet detector test cfg/coco.data cfg/yolov4.cfg yolov4.weights data/person.jpg -i 0 -thresh 0.25Download sample video : https://drive.google.com/file/d/1w4emvTuxVhDWUGsQ6uwWPXhjL74sxOIJ/view./darknet detector demo cfg/coco.data cfg/yolov4.cfg yolov4.weights test50.mp4 -i 0 -thresh 0.25
샘플비디오 실행 결과

Darknet_ROS2 : ROS2에서 Darknet 사용하기
위의 darknet 빌드 없이 사용 가능하다. openrobotics_darknet_ros로 대신한다.★ vision_msgs 클론 한다.
git clone https://github.com/ros-perception/vision_msgs.git
git checkout foxy
colcon build --symlink-install --packages-select vision_msgs
source install/setup.bash★ 다크넷 로스 Wrapper 클론
git clone https://github.com/ros2/darknet_vendor.gitcolcon build --symlink-install --packages-select darknet_vendorfatal error: cuda_runtime.h: No such file or directory 에러가 나오는 경우
export CPATH=/usr/local/cuda/targets/x86_64-linux/include:$CPATH
export LD_LIBRARY_PATH=/usr/local/cuda/targets/x86_64-linux/lib:$LD_LIBRARY_PATH
export PATH=/usr/local/cuda/bin:$PATH 해준다.error: ‘IplImage’ does not name a type; 에러가 나오는 경우build/darknet_vendor/_deps/darknet-download-src/src/image_opencv.cpp 파일 수정'''
IplImage *image_to_ipl(image im) 와 image ipl_to_image(IplImage* src) 함수는 삭제하고, image를 mat 로 바로 컨버전 하도록 수정한다. Mat image_to_mat(image im)
{
    image copy = copy_image(im);
    constrain_image(copy);
    if(im.c == 3) rgbgr_image(copy);//IplImage *ipl = image_to_ipl(copy);
    //Mat m = cvarrToMat(ipl, true);
    //cvReleaseImage(&ipl);
 Mat m(cv::Size(im.w,im.h), CV_8UC(im.c));
 int x,y,c;int step = m.step;
 for(y = 0; y < im.h; ++y){
     for(x = 0; x < im.w; ++x){
         for(c= 0; c < im.c; ++c){
             float val = im.data[c*im.h*im.w + y*im.w + x];
             m.data[y*step + x*im.c + c] = (unsigned char)(val*255);
         }
     }
 }
    free_image(copy);
    return m;
}image mat_to_image(Mat m)
{
    //IplImage ipl = m;
    //image im = ipl_to_image(&ipl);
 int h = m.rows;
 int w = m.cols;
 int c = m.channels();
 image im = make_image(w, h, c);
 unsigned char *data = (unsigned char *)m.data;
 int step = m.step;
 int i, j, k;for(i = 0; i < h; ++i){
     for(k= 0; k < c; ++k){
         for(j = 0; j < w; ++j){
             im.data[k*w*h + i*w + j] = data[i*step + j*c + k]/255.;
         }
     }
 }
    rgbgr_image(im);
    return im;
}
'''CV_CAP_PROP_FRAME_WIDTH 변수 not declared 에러가 나오는 경우
    CV_ 는 cv:: 로 변경 후
다시 colcon build 하고 source install/setup.bash 해준다.=== GPU 사용을 위해서 ~/vision_ws/build/darknet_vendor/_deps/darknet-download-src$ 안의 Makefile 수정 해준다.GPU=1
CUDNN=1
OPENCV=1
OPENMP=0
DEBUG=0================================================/usr/bin/ld: cannot find -lcudart
/usr/bin/ld: cannot find -lcublas
/usr/bin/ld: cannot find -lcurand  에러가 나오는 경우$locate libcudart.so
$sudo ln -s /usr/local/cuda/targets/x86_64-linux/lib/libcudart.so /usr/lib64
$ sudo ln -s /usr/local/cuda/targets/x86_64-linux/lib/libcublas.so /usr/lib64
$ sudo ln -s /usr/local/cuda/targets/x86_64-linux/lib/libcurand.so /usr/lib64 해준다.★ openrobotics_darknet_ros 클론
git clone https://github.com/ros2/openrobotics_darknet_ros.git
colcon build --symlink-install --packages-select openrobotics_darknet_ros=============================================
subscribe 하는 topic 명을 맞춰주기 위해서,
openrobotics_darknet_ros/src/detector_node.cpp를 열어서// Input topic ~/images [sensor_msgs/msg/Image]
  impl_->image_sub_ = this->create_subscription<sensor_msgs::msg::Image>(
    "/image_raw", 12, std::bind(&DetectorNodePrivate::on_image_rx, &*impl_, std::placeholders::_1));--> topic 명을 수정 했음.
==============================ros2 run openrobotics_darknet_ros detector_node __params:=detector_node_params.yamlros2 run openrobotics_darknet_ros detector_node --ros-args --params-file detector_node_params.yamlros2 run openrobotics_darknet_ros detector_node --ros-args --params-file ~/robot_ws/src/openrobotics_darknet_ros/detector_node_params.yaml chmod a+r src/openrobotics_darknet_ros/yolov3-tiny.cfg
chmod a+r src/openrobotics_darknet_ros/yolov3-tiny.weights
chmod a+r src/openrobotics_darknet_ros/coco.names ros2 run openrobotics_darknet_ros detector_node --ros-args --params-file ~/robot_ws/src/openrobotics_darknet_ros/detector_node_params.yaml=======================================================
yaml 파일 경로 설정은 다시 확인 해야 함. 내가 이부분을 잘 몰라서,
일단은 실행을 위해
ros2 run openrobotics_darknet_ros detector_node --ros-args
--params-file ~/vehicle_ws/build/openrobotics_darknet_ros/detector_node_params.yaml 로 실행. yolov4로 하면 다음과 같이 에러남.
CUDA Error: out of memory
detector_node: /home/kzi/vision_ws/build/darknet_vendor/_deps/darknet-download-src/src/cuda.c:36: check_error: Assertion `0' failed.yolov3로 일단 할 것yaml file 내용. [ ~/vehicle_ws/build/openrobotics_darknet_ros$ ]~/vehicle_ws/build/openrobotics_darknet_ros$ cat detector_node_params.yaml /**:
  ros__parameters:
    network:
      config: "/home/kzi/vehicle_ws/build/openrobotics_darknet_ros/yolov3-tiny.cfg"
      weights: "/home/kzi/vehicle_ws/build/openrobotics_darknet_ros/yolov3-tiny.weights"
      class_names: "/home/kzi/vehicle_ws/build/openrobotics_darknet_ros/coco.names"
    detection:
      threshold: 0.25
      nms_threshold: 0.45
darknet_vendor 를 Cmake로 컴파일 시 에러 처리 방법
(darknet_vendor는 darknet의 CMake wrapper 임)
darknet_vendor$ mkdir build
darknet_vendor$ cd build/
darknet_vendor/build$ cmake -DCMAKE_BUILD_TYPE=Release ..
-- The C compiler identification is GNU 9.3.0
-- The CXX compiler identification is GNU 9.3.0
-- Detecting C compiler ABI info
-- Detecting C compiler ABI info - done
-- Check for working C compiler: /usr/bin/cc - skipped
-- Detecting C compile features
-- Detecting C compile features - done
-- Detecting CXX compiler ABI info
-- Detecting CXX compiler ABI info - done
-- Check for working CXX compiler: /usr/bin/c++ - skipped
-- Detecting CXX compile features
-- Detecting CXX compile features - done
-- Looking for pthread.h
-- Looking for pthread.h - found
-- Performing Test CMAKE_HAVE_LIBC_PTHREAD
-- Performing Test CMAKE_HAVE_LIBC_PTHREAD - Failed
-- Looking for pthread_create in pthreads
-- Looking for pthread_create in pthreads - not found
-- Looking for pthread_create in pthread
-- Looking for pthread_create in pthread - found
-- Found Threads: TRUE
-- The CUDA compiler identification is unknown
-- Detecting CUDA compiler ABI info
-- Detecting CUDA compiler ABI info - failed
-- Check for working CUDA compiler: /usr/bin/nvcc
-- Check for working CUDA compiler: /usr/bin/nvcc - broken
CMake Error at /usr/local/share/cmake-3.20/Modules/CMakeTestCUDACompiler.cmake:52 (message):
  The CUDA compiler"/usr/bin/nvcc"is not able to compile a simple test program.It fails with the following output:Change Dir: /home/kzi/vehicle_ws/src/darknet_vendor/build/CMakeFiles/CMakeTmp

    Run Build Command(s):/usr/bin/make -f Makefile cmTC_d1887/fast && /usr/bin/make  -f CMakeFiles/cmTC_d1887.dir/build.make CMakeFiles/cmTC_d1887.dir/build
    make[1]: Entering directory '/home/kzi/vehicle_ws/src/darknet_vendor/build/CMakeFiles/CMakeTmp'
    Building CUDA object CMakeFiles/cmTC_d1887.dir/main.cu.o
    /usr/bin/nvcc      -c /home/kzi/vehicle_ws/src/darknet_vendor/build/CMakeFiles/CMakeTmp/main.cu -o CMakeFiles/cmTC_d1887.dir/main.cu.o
    ptxas fatal   : Value 'sm_30' is not defined for option 'gpu-name'
    make[1]: *** [CMakeFiles/cmTC_d1887.dir/build.make:78: CMakeFiles/cmTC_d1887.dir/main.cu.o] Error 255
    make[1]: Leaving directory '/home/kzi/vehicle_ws/src/darknet_vendor/build/CMakeFiles/CMakeTmp'
    make: *** [Makefile:127: cmTC_d1887/fast] Error 2CMake will not be able to correctly generate this project.
Call Stack (most recent call first):
  CMakeLists.txt:138 (enable_language)-- Configuring incomplete, errors occurred!
See also "/home/kzi/vehicle_ws/src/darknet_vendor/build/CMakeFiles/CMakeOutput.log".
See also "/home/kzi/vehicle_ws/src/darknet_vendor/build/CMakeFiles/CMakeError.log".
===============================================================
이 경우 CMakeList.txt 파일에 다음을 추가 한다.
set(CMAKE_CUDA_COMPILER "/usr/local/cuda-11.1/bin/nvcc")그리고 나서 다시 cmake -DCMAKE_BUILD_TYPE=Release .. 실행 후 make 하면
위의 error: ‘IplImage’ does not name a type; 나올 수 있는데 그러면 위에서 처럼 수정 해준다.
Rviz2에서 detection 결과 2D Bounding box로 보기
image topic과 detection topic을 subscribe 해서 그 image 위에 bounding box를 그린 image를 publish 하는 package를 클론 한다. git clone https://github.com/ros2/detection_visualizer.git

colcon build --symlink-install문제는 subscribe 하는 image topic과 frame_id를 일치 시켜 줘야 하는데,
일단은 체계적으로 하기 전에 무식하게 소스를 수정 한다. __init__.py 파일을 열어서 먼저 구독하는 토픽이름을 맞춰 준다. (/image_raw와 /detector_node/detections)self._image_sub = message_filters.Subscriber(self, Image, '/image_raw')self._detections_sub = message_filters.Subscriber(self, Detection2DArray, '/detector_node/detections')억지로 frame_id를 넣어 주기 위해서,
def on_detections(self, image_msg, detections_msg):
....
#self._image_pub.publish(self._bridge.cv2_to_imgmsg(cv_image, encoding="bgr8")) 는 주석처리하고 다음을 추가한다. img_msg = self._bridge.cv2_to_imgmsg(cv_image, encoding="bgr8")
img_msg.header.frame_id = 'camera_frame'
self._image_pub.publish(img_msg)
전체 node/topic 그래프는 다음과 같다.

=== 지금까지 과정 요약 ===1. webcam image 입력
$ ros2 run opencv_cam opencv_cam_main --ros-args --param index:=02. yolo detector node 동작
$ ros2 run openrobotics_darknet_ros detector_node --ros-args --params-file ~/vehicle_ws/build/openrobotics_darknet_ros/detector_node_params.yaml3. detection visualizer 토픽 발행
$ ros2 run detection_visualizer detection_visualizer4. Rviz 실행 후 확인ros2 run tf2_tools view_frames.py
evince frames.pdf
잔여 항목 : yaml 파일 경로 지정, frame_id 자동 설정, 이미지토픽 네임 자유 설정 확인 (/image_raw 외)
클론한 git 의 주소를 확인하는 명령. $git remote get-url origin
darknet ros 3d : clone 할 얘들
git clone https://github.com/IntelligentRoboticsLabs/gb_visual_detection_3d.gitgit checkout ros2_eloquent 버전으로 그냥 zip 다운로드 한 뒤에 darknet_ros_3d 폴더만 ~/vision_sw/src 폴더 안에 압축 해제 한다.https://github.com/leggedrobotics/darknet_ros/tree/foxy/darknet_ros_msgs
의 foxy 버전https://github.com/IntelligentRoboticsLabs/gb_visual_detection_3d_msgs.git3개를 추가하고 빌드 해준다..$ ros2 run darknet_ros_3d darknet3d_nodeframe_id를 맞춰주고 /image_raw 토픽을 입력으로 넣도록 할것이 남음...
https://github.com/IntelligentRoboticsLabs/gb_visual_detection_3d/tree/ros2_eloquent  참고
3d와 2d topic 비교
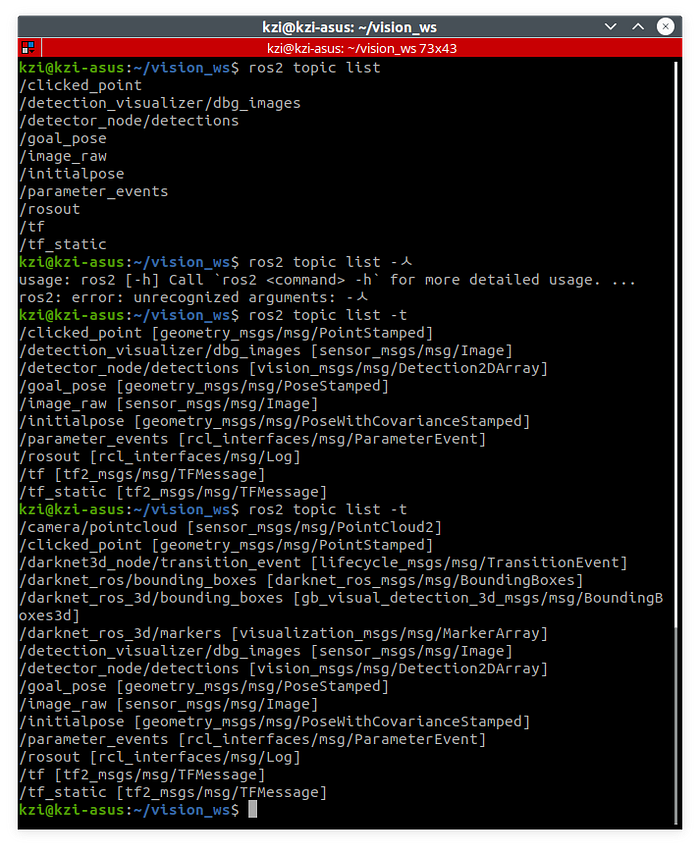
그냥 Webcam 타입의 monocular camera로는 거리 정보를 확인 할 수는 없는 것 같음. 내가 모르는 것일 수도 있고, Rviz 상에 표시하기 위해서는 Depth camera를 통해서 point cloud information을 publish 해야 하는 것 같다.
그 다음 2d bounding box 를 확인 해야 한다. (/detection_visualizer/dbg_images [sensor_msgs/msg/Image]) 따로 논다… ㅎㅎ
2d, 3d 연계하는 부분은 추가 진행이 필요하다..